Vinyl Siding Installation Plans: The Definitive Professional Guide
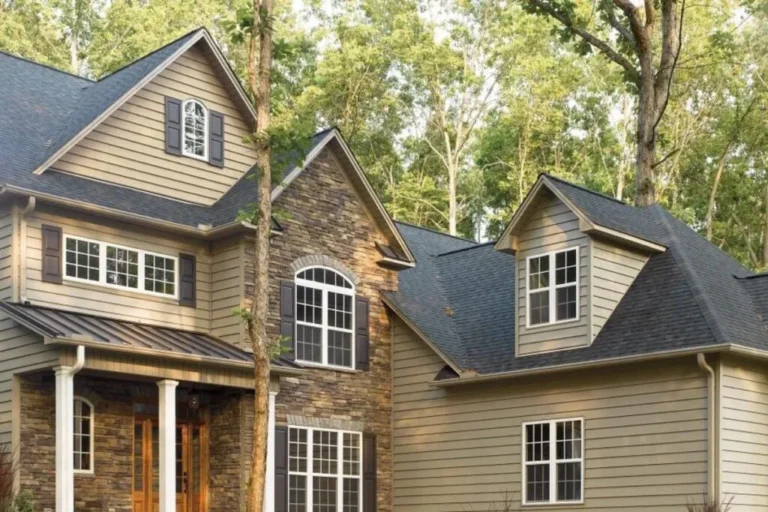
The exterior envelope of a residential structure serves as more than a mere aesthetic skin; it is a complex, multi-layered defense mechanism against the kinetic energy of wind, the pervasive nature of moisture, and the relentless cycle of thermal expansion. In the contemporary building landscape, vinyl siding has transitioned from a mid-century novelty to a highly engineered polymer system. Without a comprehensive strategy that accounts for structural movement and vapor management, even the highest-grade panels are prone to catastrophic failure.
Effective project management in exterior remodeling requires a departure from the “product-first” mindset. Instead, homeowners and contractors must adopt a systemic approach that views the wall assembly as a singular, living entity. This involves a forensic analysis of the existing substrate, a calculated approach to flashing geometry, and a precise understanding of fastener physics. The difference between a fifteen-year facade and a fifty-year facade rarely lies in the brand of the vinyl; it lies in the invisible layers of preparation that precede the first click of a panel into its starter strip.
Designing a robust sequence of operations involves balancing logistical constraints with environmental realities. In regions with extreme temperature deltas, the plan must account for the significant linear movement of PVC, which can expand or contract by over half an inch across a standard twelve-foot span. This article explores the deep-tier technical requirements and strategic frameworks necessary to develop professional-grade vinyl siding installation plans, ensuring that the final result satisfies both the aesthetic demands of curb appeal and the uncompromising standards of building science.
Understanding “vinyl siding installation plans.”

In the context of professional cladding, a true installation plan is a multidimensional document that harmonizes architectural intent with structural limitations. Failure to integrate any one of these perspectives results in an installation that may look visually sound on day one but will deteriorate rapidly under environmental stress.
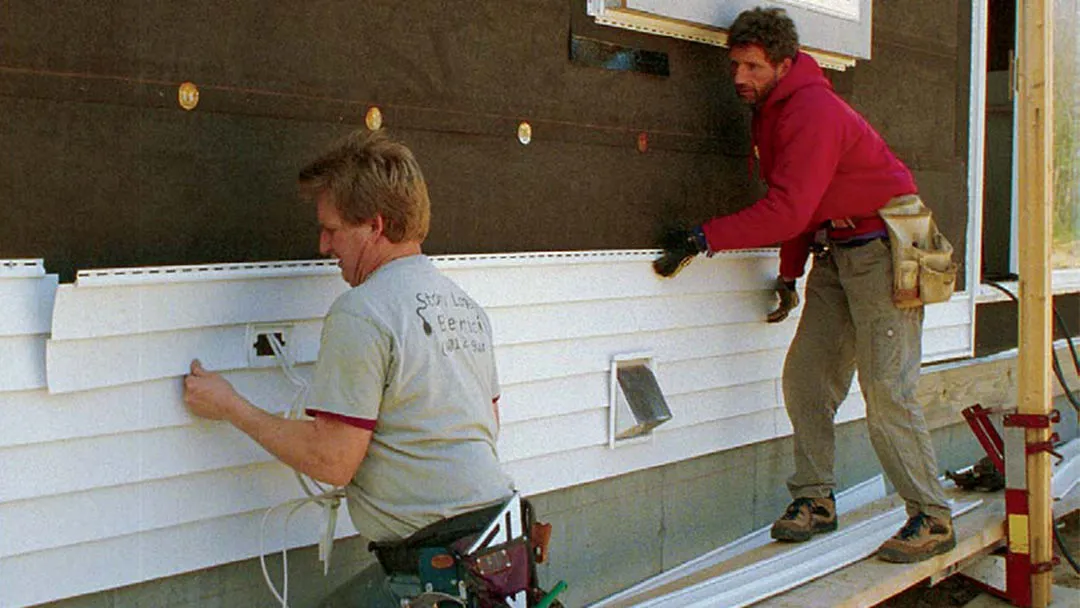
A common misunderstanding in the development of vinyl siding installation plans is the belief that vinyl siding is waterproof. It is not. Vinyl is designed as a rainscreen, a primary shedder of water, but it assumes that a percentage of moisture will inevitably penetrate the seams. Consequently, the plan must focus heavily on the “Weather Resistive Barrier” (WRB) and the flashing at all penetrations. If the plan treats the vinyl as a literal seal, it ignores the basic physics of wind-driven rain and capillary action, which can trap moisture behind panels and lead to concealed rot.
Another oversimplification involves the “floating” nature of the material. Vinyl siding is one of the few building materials that is not intended to be fastened tightly to the structure. A rigorous plan dictates that nails remain “proud” of the hem, allowing the panels to slide horizontally. This counterintuitive requirement is the most frequent point of failure in amateur plans. When planners ignore the specific mechanical requirements of the nail hem, they inadvertently design a system that will buckle, warp, or “oil-can” as soon as it is exposed to direct sunlight.
Contextual Evolution: From Decorative Trim to Engineered Systems
The history of vinyl siding is a study in material science evolution. When it first appeared in the late 1950s, it was marketed as a low-maintenance alternative to wood clapboard. These early iterations were brittle and prone to fading, often mimicking the thinness of the aluminum siding they sought to replace. Over the decades, the chemistry of the material shifted from simple PVC to complex composites involving acrylic capstocks and impact modifiers. This change necessitated a parallel shift in how installations were planned; the material became more rigid, but also more sensitive to the quality of the underlying wall.
In the 1980s and 90s, the industry saw the rise of the “integrated system.” Manufacturers began producing specialized accessories, J-channels, F-channels, and utility trims that allowed for a more finished look. This era moved the planning process away from “making it fit” to “engineering the transition.” The focus turned to how siding interacts with windows, soffits, and rooflines. This was a critical turning point where the plan became about the “accessories” as much as the “body” of the house.
Today, we are in the era of high-performance cladding. Modern plans often include integrated foam backing for increased R-value and structural rigidity. This adds a layer of complexity to the installation, as the increased thickness of the panels changes the “depth” of the window and door casings. The modern plan is now an exercise in 3D geometry, requiring the installer to build out trim profiles to ensure that the siding does not protrude past the very features it is supposed to highlight.
Conceptual Frameworks and Mental Models

To execute a flawless installation, planners must utilize specific mental models that prioritize structural longevity over immediate visual gratification.
1. The “Water-Shedding” Hierarchy
This framework dictates that every layer of the exterior must overlap the layer below it. This is often referred to as “shingling.” A plan must detail how the house wrap integrates with window flashing and how that flashing overlaps the siding starter strip. If a single layer is tucked “under” rather than “over” at a critical junction, the entire system fails. This model is non-negotiable and governs every vertical inch of the project.
2. The Thermal Expansion Constant
A master plan treats the siding as a dynamic, moving object. The mental model here is one of “calculated tolerance.” The planner must know the temperature at the time of installation and adjust the gaps at J-channels accordingly. If it is 90°F, the gaps can be small (1/4 inch); if it is 30°F, the gaps must be larger (1/2 inch) to allow for summer expansion. This model prevents the structural “binding” that causes panels to warp.
3. The Substrate Integrity Model
This model assumes that the siding is only as good as what is behind it. A plan following this framework includes a mandatory “substrate audit” where the sheathing is inspected for rot and the wall’s “flatness” is measured. If the wall is not planar, the siding will follow those curves, creating shadows and dips that reveal the material’s synthetic nature. The plan must account for “furring” or shimming the wall to create a true plane.
Key Categories of Installation Variations
Different architectural styles and regional climates demand specific variations in the installation sequence.
-
Standard Horizontal Lap: The most common approach, focusing on long, unbroken lines. Trade-offs include visible seams on long walls if not lapped away from high-traffic areas.
-
Vertical Board and Batten: Requires specific “blocking” or horizontal furring strips behind the sheathing to provide a nailing surface. This changes the depth of the wall and affects window trim planning.
-
Insulated/Contoured Siding: Features a rigid foam backing. This requires wider J-channels and specialized “oversized” accessories to accommodate the increased profile depth.
-
Shake and Shingle Modules: These are installed from the bottom up but have distinct “click” mechanisms that require more force. The plan must account for the different expansion rates of polypropylene versus standard PVC.
-
High-Wind/Hurricane Zone Plans: These involve tighter nailing schedules (every 8 inches instead of 16) and the use of specialized “wind-lock” starter strips and heavy-duty “rolled-over” nail hems.
Comparison of Installation Logistics
| Feature | Horizontal Lap | Vertical Board & Batten | Insulated Vinyl |
| Nailing Orientation | Horizontal into studs | Vertical into horizontal blocking | Horizontal into studs |
| Expansion Gap | Side-to-side | Vertical (top and bottom) | Side-to-side (increased) |
| Trim Depth | Standard (3/4″) | Standard (3/4″) | Deep (1-1/8″ to 1-1/2″) |
| Complexity | Low to Moderate | High (due to blocking) | Moderate (due to trim) |
Detailed Real-World Scenarios
Scenario A: The Historic Retrofit
A 1920s Victorian home with original wood siding that has become a maintenance burden.
-
Constraint: The original trim is intricate and must be preserved or replicated.
-
Decision Point: The plan must include “capping” or “wrapping” the old trim in color-matched aluminum coil before the siding is installed.
-
Failure Mode: Installing vinyl directly over old, rotting wood siding, which traps moisture and accelerates structural decay.
-
Second-Order Effect: The added thickness of the vinyl may make the original window sills appear “recessed,” requiring the addition of custom sill extenders.
Scenario B: The Coastal New Build
A modern home situated in a high-salt, high-wind environment.
-
Constraint: Maximum wind load requirements and corrosive salt air.
-
Decision Point: The plan utilizes stainless steel fasteners and a “double-hem” siding product rated for 200 mph.
-
Risk: Standard galvanized nails will corrode in salt air, causing “rust streaks” and eventual fastener failure.
-
Strategy: Every penetration is triple-sealed with high-grade tri-polymer sealants rather than standard silicone.
Planning, Cost, and Resource Dynamics
The economics of a siding project are often skewed by a focus on material costs alone. In reality, labor and “hidden” materials, such as sealants, flashing, house wrap, and waste, account for a significant portion of the budget.
| Cost Component | Percentage of Budget | Variability Factors |
| Main Vinyl Panels | 35% – 45% | Grade, thickness, and color (darker = more expensive) |
| Accessories & Trim | 15% – 20% | Complexity of window/door casings and soffits |
| Preparation & Substrate | 10% – 15% | Extent of rot repair and wall leveling required |
| Labor & Expertise | 30% – 40% | Regional rates and installer certification level |
Resource Variability
The availability of skilled labor is a primary constraint. A plan that requires complex mitered corners or intricate “custom” trim work will necessitate a higher tier of contractor, increasing the lead time and cost.
Tools, Strategies, and Support Systems
Standard carpentry tools are often insufficient for the specific demands of PVC.
-
The Snap-Lock Punch: Essential for creating “lugs” in the top edge of a panel that has been cut to fit under a window. This allows the panel to lock into the undersill trim without visible fasteners.
-
The Slot-Punch: Used to extend the factory nailing slots if a stud doesn’t align with the existing holes. Nailing through the vinyl itself (face-nailing) is a major violation of code.
-
Vinyl Siding Blades: Fine-tooth circular saw blades specifically designed to cut PVC without shattering it, especially in cold weather.
-
The Zip-Tool (Unlocking Tool): Critical for repairs or for “locking” panels that have become disengaged during a difficult run.
-
Laser Levels: Used to establish a perfectly level starter strip.
-
Pliable Sealants: Use only high-performance sealants (like ASTM C920 compliant) that can handle the 25% movement of the vinyl without tearing.
Risk Landscape and Failure Modes
The “Risk Taxonomy” of vinyl siding is dominated by water intrusion and thermal distortion.
-
Capillary Suck: Water can be pulled upward between two flat surfaces. If the flashing behind the J-channel isn’t properly “heeled” up, water can be sucked behind the siding and into the wall cavity.
-
The “Tight-Nailing” Syndrome: When nails are driven too deep, the siding cannot move. This leads to “buckling,” where the panels bow outward in the heat, creating permanent “memory” in the plastic that cannot be fixed without replacement.
-
Thermal Bridging: On houses with poor interior insulation, heat leaking through the studs can cause localized “hot spots” on the vinyl, leading to uneven fading or warping in very specific patterns that reveal the house’s framing.
Governance, Maintenance, and Long-Term Adaptation
A successful installation plan includes a “Post-Occupancy” governance strategy. Vinyl is low-maintenance, not zero-maintenance.
-
Annual Hydraulic Check: Every spring, homeowners should inspect the weep holes at the bottom of the panels to ensure they aren’t clogged with dirt or insects. If water cannot drain out, it will find its way in.
-
Sealant Review Cycles: Caulk around windows and doors typically lasts 5-7 years. A governance plan should include a scheduled “re-caulk” of these penetrations to maintain the airtight integrity of the system.
-
Adjustment Triggers: If a panel “rattles” excessively or shows signs of “un-clicking,” it is an indicator that the thermal expansion has exceeded the planned gaps. This requires immediate intervention before the panel detaches.
Layered Maintenance Checklist
-
Visual: Scan for “waving” or “rippling” on the sunny side of the house.
-
Structural: Check the “play” in the panels; they should slide 1/2 inch with manual pressure.
-
Hygienic: Wash with a soft brush and mild soap to remove atmospheric soot that can degrade the UV-resistant capstock.
Measurement, Tracking, and Evaluation
Evaluating the success of vinyl siding installation plans requires tracking both “Leading” and “Lagging” indicators.
Leading Indicators (During Installation)
-
Nail Depth Consistency: Are 100% of the nails driven with a 1/16-inch gap?
-
Level Accuracy: Does the laser level show a deviation of less than 1/4 inch across a 50-foot run?
-
Flashing Integration: Are all “head flashings” over windows tucked behind the house wrap?
Lagging Indicators (Post-Installation)
-
Energy Performance: A 10-15% reduction in cooling costs (for insulated plans) is a signal of a successful thermal break.
-
Zero-Call-Back Rate: The ultimate metric for a contractor is the absence of “un-clicked” panels or buckling after the first full seasonal cycle.
Common Misconceptions and Oversimplifications
-
Myth: You can just install vinyl over old wood.
-
Correction: While possible, it is high-risk. It hides existing rot and adds thickness that complicates window flashing. The “best practice” plan always involves stripping to the sheathing.
-
-
Myth: Vinyl is a fire hazard.
-
Correction: Modern PVC has a high ignition temperature and is self-extinguishing.
-
-
Myth: Darker colors fade in 5 years.
-
Correction: This was true in the 1970s. Modern “Cool Color” pigments and acrylic capstocks carry 25-year “no-fade” warranties.
-
-
Myth: Siding provides structural strength.
-
Correction: Siding is purely a decorative and protective rainscreen. It has zero structural load-bearing capacity.
-
-
Myth: Maintenance isn’t required.
-
Correction: Mold and mildew can grow on the surface of vinyl.
-
Conclusion
The transition from a conceptual design to a completed exterior is a journey of technical precision. Developing robust vinyl siding installation plans is not an administrative hurdle but a fundamental requirement for protecting a property’s value. By respecting the laws of physics and the specific mechanical properties of PVC, homeowners can ensure their structure remains resilient, efficient, and aesthetically dignified for the decades to come.