Compare Vinyl Siding Textures: A Definitive Guide to Surface Grain
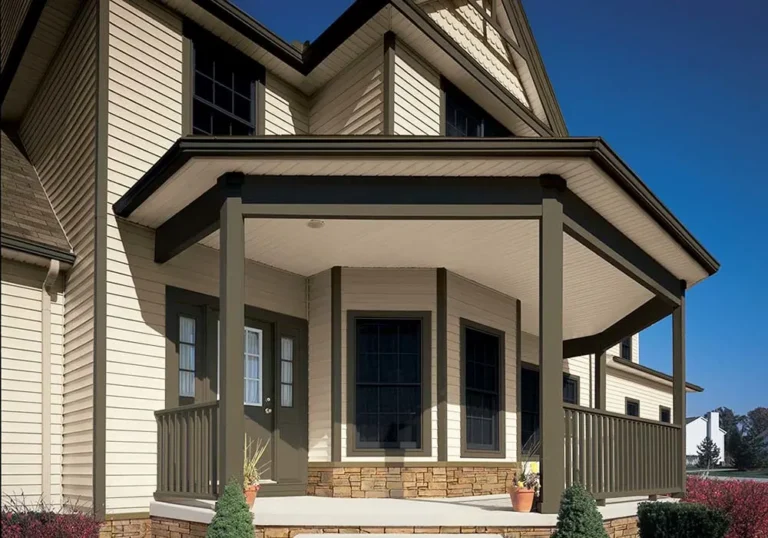
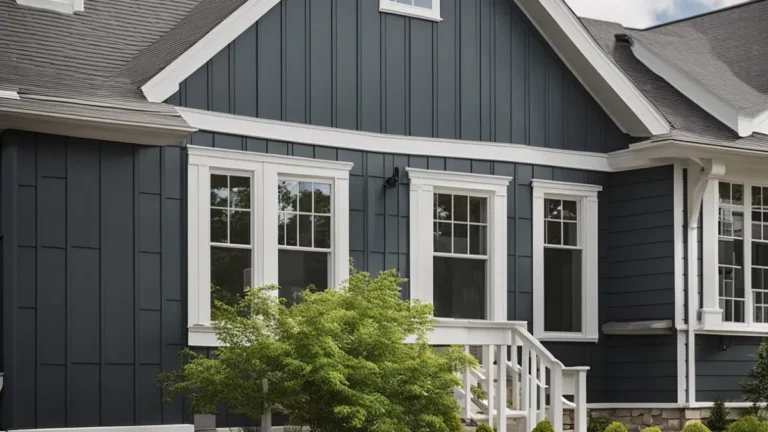
Compare vinyl siding textures. The exterior envelope of a residential structure serves as the primary interface between a building’s private interior and the public environment. Within the realm of modern cladding, vinyl siding has evolved from a utilitarian, monochromatic plastic sheet into a sophisticated medium capable of replicating complex natural materials. This evolution is driven not by color alone, but by the tactile and visual nuances of surface topography. The texture of a siding panel dictates how light interacts with the facade, how the building ages, and how it is perceived within its local architectural context.
When homeowners and architects evaluate cladding options, they often focus on the “what” (the material) and the “where” (the color), frequently neglecting the “how,” specifically, how the surface grain influences the overall character of the home. A texture that appears appropriate in a high-resolution catalog may fail to deliver the desired effect when subjected to the harsh, shifting angles of natural sunlight. This mismatch occurs because texture is essentially a tool for managing shadows. Without depth and variation in the surface grain, a large wall can appear sterile and artificial, a phenomenon often referred to as “plastic sheen.”
Navigating the contemporary market requires a move beyond binary choices. It is no longer a simple decision between “smooth” and “wood-like.” Modern manufacturing utilizes advanced thermoforming and digital embossing to create layers of micro-texture that mimic everything from hand-split cedar to sand-blasted timber. To truly master the selection process, one must analyze the interplay between mil thickness, grain depth, and the specific gloss units of the finish. This article provides a definitive exploration of these variables, offering a framework for those who demand professional-grade clarity in their exterior design strategy.
Understanding “compare vinyl siding textures.”
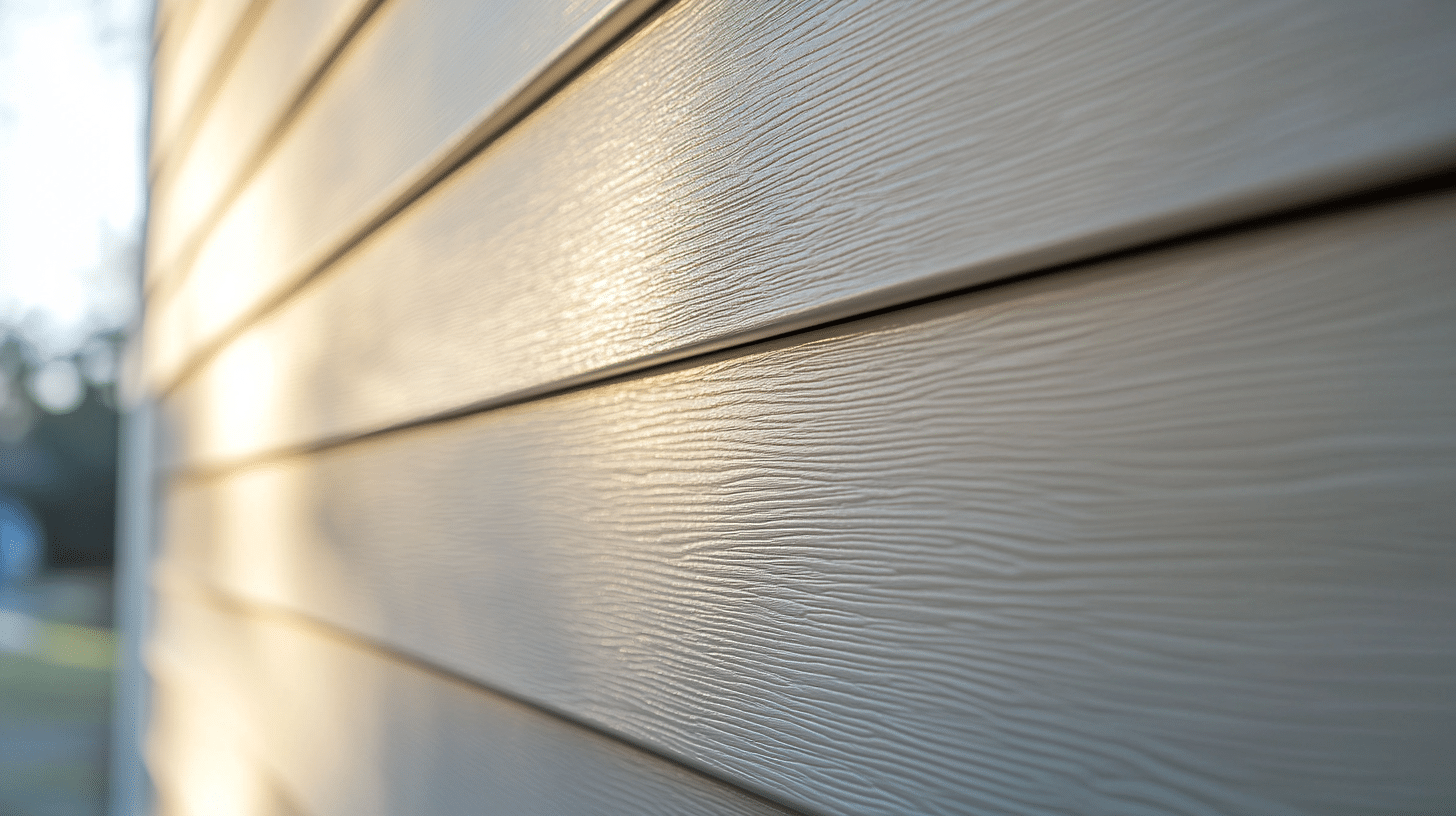
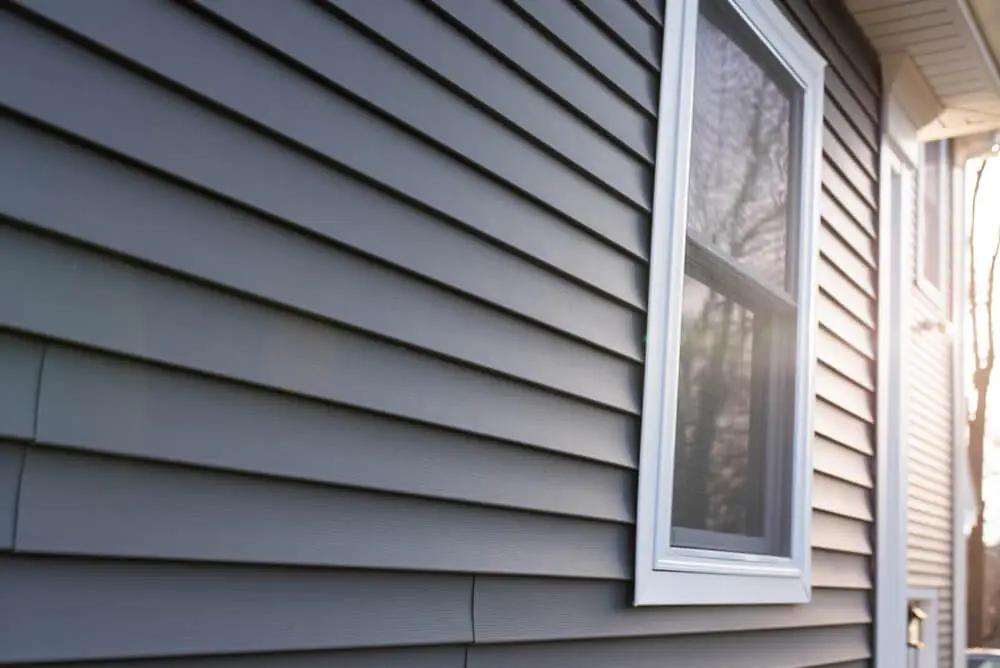
To accurately compare vinyl siding textures, one must first dismantle the oversimplification that texture is merely an imitation of wood. While wood replication remains the dominant goal, texture serves several technical and optical functions that are often misunderstood. A high-quality texture is designed to diffuse light, thereby reducing the “specular reflection” that makes plastic look like plastic. If the embossing is too shallow, the panel reflects light in a uniform, blinding sheet; if it is too deep or repetitive, it creates an unnatural “stamped” appearance that betrays its synthetic origin.
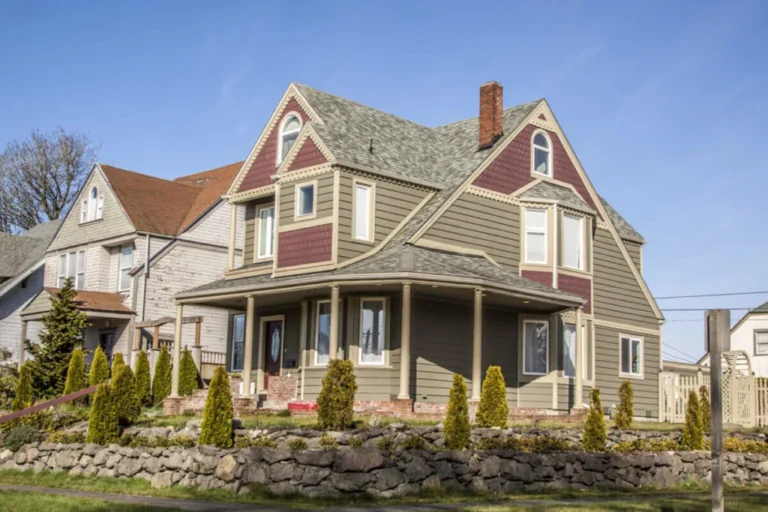
One of the primary risks in comparing these materials is the failure to account for “repeat patterns.” Lower-end vinyl products often use a single embossing drum for thousands of feet of siding, leading to a visible pattern repetition on a large wall, a “wallpaper effect” that destroys architectural credibility. Premium textures are engineered with varied grain patterns and longer repeat cycles, ensuring that no two adjacent panels look identical. This variation is the cornerstone of authenticity in historic or high-end residential applications.
Furthermore, texture influences the physical performance of the panel. Deeply embossed textures can actually hide minor surface imperfections, such as “oil-canning” (the slight waving of vinyl due to thermal expansion). Conversely, a perfectly smooth texture is the most difficult to manufacture and install correctly, as it highlights every ripple in the underlying wall sheathing. Therefore, comparing textures is not just an aesthetic exercise; it is a pragmatic assessment of how the material will behave under thermal stress and how it will conceal the realities of construction.
Historical Evolution of Surface Topography
The journey of vinyl siding texture began in the late 1950s with the “brushed” finish. These early attempts were rudimentary, consisting of shallow, linear grooves that were meant to simulate the look of freshly painted pine. Because the manufacturing technology of the time was limited, these textures lacked the three-dimensional depth required to create realistic shadows. The result was a flat, glossy appearance that led to the material’s initial reputation as a “cheap” alternative.
By the 1980s, the industry shifted toward the “wood grain” emboss. This was a significant leap, utilizing multi-level rollers to create peaks and valleys in the PVC. However, these patterns were often overly aggressive, which critics called “alligator skin.” They were too uniform and deep, catching dirt and pollutants in the crevices, which led to premature staining and maintenance headaches. The evolution was stalled by a lack of understanding regarding “gloss units”; even with wood grain, the high-gloss finishes of the era made the siding appear synthetic.
The 2000s ushered in the era of “Matte-Finish Low-Gloss” technology. Engineers realized that the texture’s success was 80% dependent on light absorption. Modern premium textures now utilize “randomized embossing,” where the grain is asymmetrical and follows the natural growth patterns of specific wood species like Eastern White Pine or Western Red Cedar. We have moved from a period of “generic plastic” to “species-specific simulation,” where the texture is calibrated to the specific architectural era of the home.
Conceptual Frameworks for Visual Depth

To select the appropriate texture, professionals use specific mental models to evaluate how a panel will look in situ.
1. The Solar Angle Model
This framework analyzes how the texture behaves at noon (direct overhead light) versus sunset (grazing light). At sunset, deep textures cast long shadows that emphasize the grain, potentially making the house look more “rustic.” A smooth texture will show no shadow, maintaining a clean, modern silhouette. The “best” texture is one that maintains its character across all 180 degrees of the sun’s daily arc.
2. The Diffusion vs. Reflection Matrix
This model categorizes textures based on their “L-value” or light-scattering ability. A “Heavy Rough Cedar” texture has a high diffusion rating, making it ideal for bright, south-facing walls. A “Satin Smooth” texture has a higher reflection rating and is better suited for shaded, wooded lots where light needs to be bounced around to prevent the house from looking gloomy.
3. The Distance-Texture Threshold
This suggests that the importance of texture detail diminishes as the viewer moves further away. However, the effect of the texture, the lack of plastic shine, remains visible even from a distance. This model helps homeowners decide where to spend their budget: premium, high-definition textures on the front porch (the “touch zone”) and perhaps more standard textures on the second-story gables.
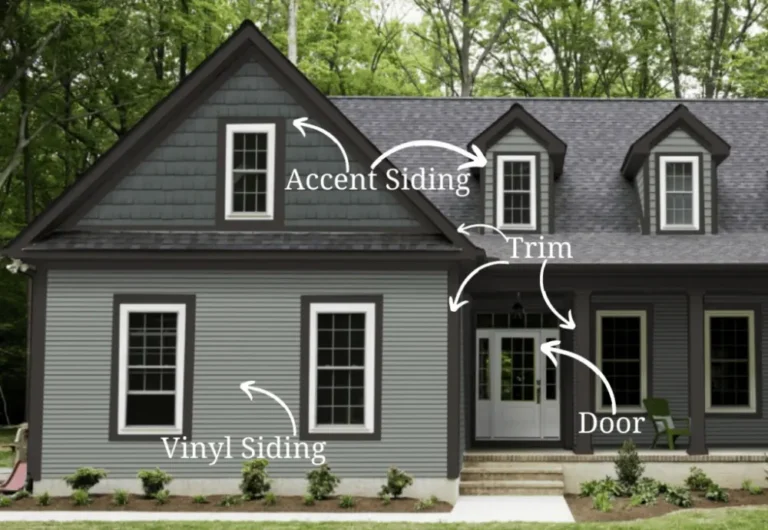
Key Texture Categories and Engineering Trade-offs
When you compare vinyl siding textures, you are typically looking at six distinct categories, each with its own set of mechanical and visual properties.
-
Smooth/Satin: Mimics sanded, painted wood. It is the most modern and “honest” finish.
-
Trade-off: Shows every imperfection in the wall; requires expert installation.
-
-
Wood Grain (Traditional): The industry standard. Features a light, linear embossing.
-
Trade-off: Can look “dated” or repetitive if the repeat cycle is short.
-
-
Rough Cedar: Deep, rugged grooves that mimic split wood.
-
Trade-off: Excellent at hiding flaws but prone to collecting dust and pollen.
-
-
Hand-Split Shake: Thick, irregular textures that mimic individual shingles.
-
Trade-off: High visual interest, but creates a “busy” facade on large homes.
-
-
Brushed/Wire-Brushed: Subtle, fine lines that look like a fresh coat of heavy paint.
-
Trade-off: Offers a matte look without the “rustic” feel of heavy grain.
-
-
Driftwood/Variegated: Uses color and texture together to mimic weathered, unpainted wood.
-
Trade-off: Expensive; requires a multi-step manufacturing process.
-
Texture Comparison and Performance Table
| Texture Category | Visual Weight | Light Diffusion | Dirt Resistance | Masking Ability |
| Smooth | Minimal | Low | Excellent | Very Low |
| Traditional Grain | Moderate | Medium | Good | Moderate |
| Rough Cedar | High | Very High | Low | High |
| Brushed | Low | High | Good | Moderate |
| Hand-Split | Very High | High | Fair | Very High |
Detailed Real-World Environmental Scenarios
Scenario A: The High-Lustre Coastal Environment
In seaside locations, the intensity of the light is doubled by the reflection from the water. A standard wood-grain siding can look like shimmering plastic under these conditions.
-
Selection Logic: A “Wire-Brushed” or “Matte Smooth” finish is superior here. The goal is to minimize reflection to prevent the “plastic glare” that is common in beach communities.
-
Failure Mode: Choosing a “Rough Cedar” texture, which might trap salt spray in the deep grooves, leading to white, hazy deposits that are difficult to wash away.
Scenario B: The Mature Wooded Lot
A home surrounded by large oak trees receives very little direct light. The shadows are naturally heavy and irregular.
-
Selection Logic: A “Hand-Split Shake” or “Deep Grain” texture is effective here. The texture provides “micro-shadows” that prevent the house from disappearing into the dark background.
-
Second-Order Effect: The texture adds a layer of “visual warmth” that makes the home feel more integrated into the natural forest environment.
Planning, Cost, and Resource Dynamics
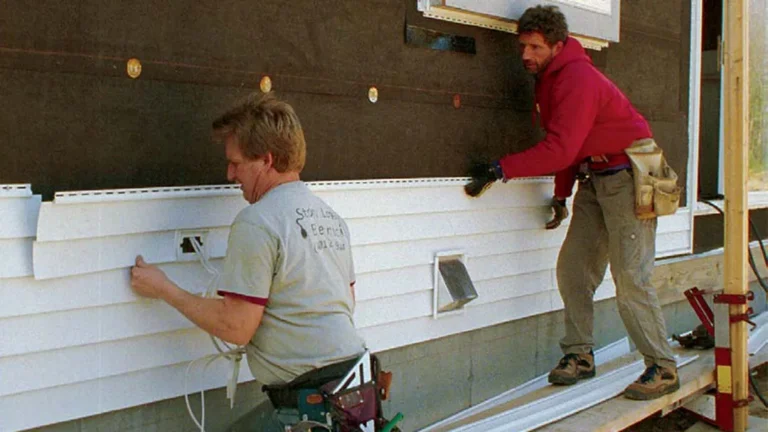
The price of vinyl siding is directly correlated to the complexity of the texture. A flat, smooth panel is cheaper to extrude than a panel that requires a multi-level embossing process with a long repeat cycle.
| Factor | Standard Texture | High-Definition Texture |
| Tooling Cost | Single-drum (short repeat) | Multi-drum (long repeat) |
| Material Gauge | .040″ – .042″ | .046″ – .055″ |
| Finish Chemistry | Standard PVC | Acrylic Capstock (Matte) |
| Labor Cost | Standard | High (Pattern matching/trim) |
Strategies for Light Management and Gloss Control
The “best” texture is often the one with the lowest gloss unit (GU) rating. In the siding industry, “gloss” refers to the percentage of light reflected at a 60-degree angle. Standard vinyl often has a GU of 15–20, which is high enough to look synthetic. Premium textures are engineered to a GU of 5–8, which matches the reflectance of a high-quality exterior latex paint.
To manage light effectively:
-
Avoid South-Facing Gloss: Never use high-gloss textures on the side of the house that receives the most sun.
-
Match Trim Gloss: If the siding is matte, the trim (J-channels, corners) must also be matte. A mismatch in texture/gloss between the field and the trim is a common indicator of poor design.
-
Utilize Variegated Colors: Textures that include “shadow lines” printed onto the grain create an illusion of depth that exceeds the physical depth of the embossing.
Risk Landscape: When Texture Fails
Texture failure is rarely about the vinyl “melting” or “rotting.” Instead, it is a failure of aesthetic performance.
-
The Wallpaper Effect: As mentioned, this is the most common failure. It occurs when the same “knot” or “grain swirl” appears every 4 feet across a 40-foot wall.
-
Dirt Entrainment: In deeply textured panels, atmospheric soot and pollen can settle into the valleys. If not cleaned, this can harbor biological growth (mildew), which is far more visible on a textured surface than a smooth one.
-
Abrasive Scuffing: Deeply textured vinyl has “peaks.” During installation or if a ladder is leaned against the house, these peaks can be flattened or scuffed, leaving a permanent shiny mark that cannot be repaired.
Maintenance and Long-Term Surface Integrity
Contrary to popular belief, textured vinyl is not maintenance-free; it is “low-maintenance.” The maintenance strategy must be adapted to the texture profile.
-
Smooth Surfaces: Can be cleaned with a simple garden hose and a soft cloth. They are the most resistant to staining.
-
Deep Grain/Cedar: Requires a soft-bristled brush to reach into the embossing. Using a high-pressure power washer on these textures can actually “strip” the matte capstock, increasing the gloss and ruining the look.
-
Annual Inspection: Check the “valleys” of the grain for signs of oxidation. If the color looks “chalky,” it is often because dirt has reacted with the UV inhibitors in the texture’s valleys.
Measurement and Evaluation Metrics compare vinyl siding textures
How do you determine if a texture is high-quality before it’s on the wall?
-
The Repeat Cycle Metric: Ask the manufacturer for the length of the embossing drum. A 12-foot repeat is the gold standard; anything under 4 feet will likely result in a visible pattern on the wall.
-
The “Hand” Test: Run your hand across the panel. If it feels “slick” or “waxy,” the gloss is too high. It should feel slightly abrasive or “dry,” similar to real wood or paper.
-
The Shadow-Depth Ratio: Measure the height of the peaks versus the depth of the valleys. A ratio of 1:3 is generally required to create enough shadow to be visible from the street (30+ feet away).
Common Misconceptions in Siding Selection
-
Myth: Deep texture means the vinyl is thicker.
-
Correction: Texture and thickness (mil gauge) are independent. You can have a very thin, poorly made panel with a very deep, aggressive texture.
-
-
Myth: Smooth siding is only for modern houses.
-
Correction: Smooth siding is historically accurate for many Colonial and Federal-style homes that used clear, sanded wood.
-
-
Myth: Texture hides all installation mistakes.
-
Correction: Texture hides minor “oil-canning,” but it can actually make “stair-stepping” (poorly aligned seams) more visible by breaking the horizontal line of the grain.
-
-
Myth: Matte finishes fade faster.
-
Correction: Fade resistance is a function of the pigment and UV stabilizers, not the texture. Modern matte capstocks (like ASA) are often more fade-resistant than old-fashioned glossy PVC.
-
Conclusion
The decision to compare vinyl siding textures is a move toward architectural maturity. It represents an understanding that the beauty of a home is found in the subtle play of light and shadow across its surfaces. Whether one chooses the austere elegance of a satin smooth finish or the rugged complexity of a hand-split shake, the goal remains the same: to create a building envelope that feels substantial, authentic, and enduring. Texture is the bridge that allows a modern polymer to meet the high standards of traditional craftsmanship, ensuring that a home looks as good under the scrutinizing rays of the afternoon sun as it does in the soft glow of dawn.