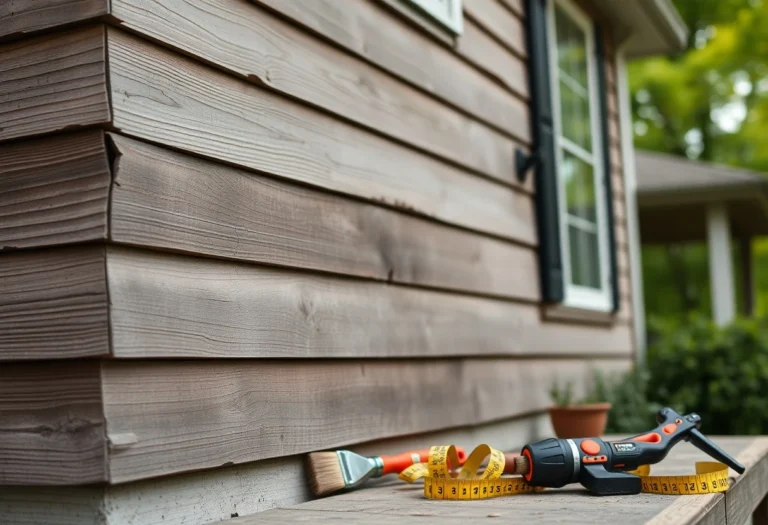
Common Vinyl Siding Nailing Mistakes: The Definitive Installation Guide
Vinyl siding is a unique building material because it is designed to move. Unlike fiber cement, wood, or brick, which remain relatively static once fastened, polyvinyl chloride (PVC) possesses a high coefficient of thermal expansion. A standard 12-foot panel can expand or contract by as much as 3/4 of an inch, depending on the temperature fluctuations between a frigid winter night and a direct-sun summer afternoon. This physical reality dictates every aspect of a professional installation, yet it remains the most misunderstood element of residential siding projects.
When an installer treats vinyl like wood, pinning it tightly to the substrate, they are essentially setting a trap for the material. As the sun beats down, the restricted plastic has nowhere to go; it bows, ripples, and eventually “smiles” or “frowns” across the facade. These distortions are not merely aesthetic failures. They represent structural stress that can lead to cracked panels, compromised water management, and the premature degradation of the building envelope. Understanding the nuances of fastener placement is therefore not just a matter of following a manual, but of mastering the physics of a floating system.
The following analysis serves as a definitive exploration of the technical requirements, systemic risks, and long-term implications of installation errors. By deconstructing the mechanics of the fastener-to-hem relationship, we can identify the specific points where projects typically fail and establish a framework for durable, high-performance exterior finishes.
Understanding “common vinyl siding nailing mistakes.”

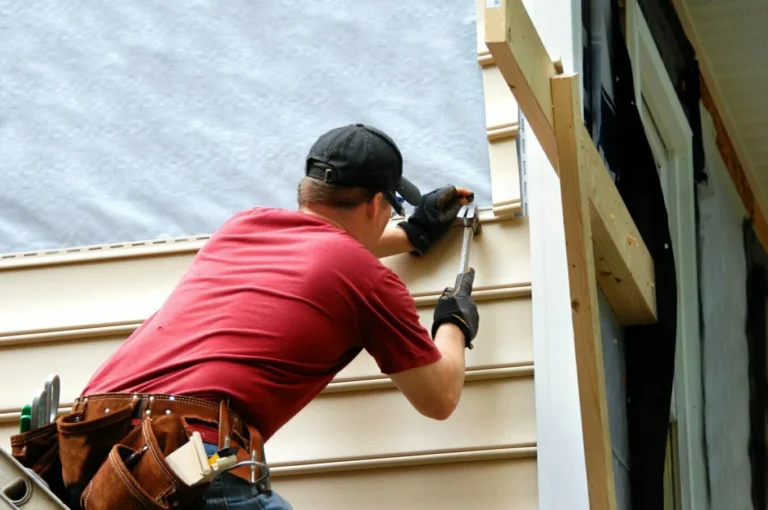
To define common vinyl siding nailing mistakes, one must first discard the notion that “nailing” is a simple act of attachment. In the context of PVC cladding, the nail is not a binder; it is a guide rail. The most frequent errors stem from a fundamental lack of appreciation for the material’s kinetic nature. While most contractors recognize that panels shouldn’t be “nailed tight,” the precision required to achieve a consistent “floating” state is often underestimated.
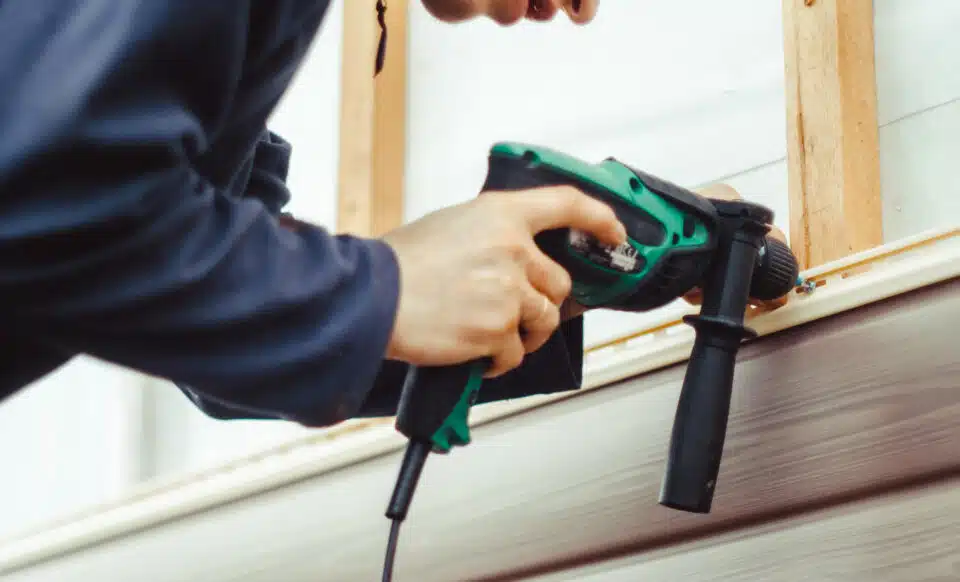
A primary misunderstanding involves the nail’s position within the hem slot. The slot is engineered to allow horizontal movement. If a fastener is driven into the far left or far right of the slot, the panel is effectively locked in one direction. During a thermal shift, the panel will push against that nail, causing the entire course to buckle. Similarly, the depth of the nail head is a critical variable. Leaving a 1/32-inch gap, roughly the thickness of a dime, between the nail head and the siding flange is the industry standard, yet achieving this consistently across thousands of fasteners requires a level of muscle memory and tool calibration that many hurried crews lack.
Oversimplification is perhaps the greatest risk to a successful installation. It is easy to say “don’t nail too hard,” but the reality involves managing the substrate’s irregularities. If a wall is not perfectly flat, a floating panel might rattle in high winds or allow moisture to drive behind the laps. The installer must balance the need for movement with the need for structural security, a tension that is often resolved poorly in high-volume residential construction.
Historical and Material Evolution of Fastening Systems
The shift from aluminum and wood to vinyl in the mid-20th century necessitated a revolution in fastening logic. Wood siding relies on the friction of the nail shank and the compression of the nail head to stay in place. Aluminum, while having some thermal movement, is significantly more rigid than PVC. When vinyl first hit the market, installers used their existing habits, driving nails home, leading to catastrophic “oil-canning” (visible waviness) that nearly derailed the product’s adoption.
Over the decades, manufacturers refined the “nailing hem.” Early versions were thin and prone to tearing; modern high-performance hems often feature double-layered “rolled” edges that provide higher wind-load resistance without sacrificing the ability to slide. Despite these engineering leaps, the human element remains the weak link. The introduction of pneumatic siding nailers in recent years has increased speed but also increased the margin for error. A manual hammer allows for a tactile “feel” of the gap, whereas a poorly calibrated pneumatic gun can overdrive a fastener in a fraction of a second, locking a panel permanently and creating the very common vinyl siding nailing mistakes that lead to warranty claims.
Conceptual Frameworks: The Floating Wall Model
To master siding installation, one must adopt specific mental models that govern how the system interacts with the environment.
-
The Centering Principle: Imagine the siding panel as a living entity that breathes from the center outward. To ensure equal movement, the first nail must be placed in the center of the panel’s length, with subsequent nails moving toward the ends. This prevents “crawling,” where a panel shifts entirely to one side over several seasons.
-
The “Space-Time” Gap: This framework requires the installer to consider the ambient temperature at the moment of installation. If installing in 90-degree heat, the panels are already expanded; the gaps at the J-channels should be minimal (1/4 inch). If installing in 30-degree weather, the panels are contracted; the gaps must be wider (3/8 to 1/2 inch) to accommodate future expansion.
-
The Substrate Integrity Loop: No fastening system survives a failing substrate. This model posits that the nail is only as good as the nailable surface (OSB, plywood, or furring strips). Errors often occur when installers attempt to bridge “soft spots” or overdrive nails to pull a warped wall flat, violating the floating principle to fix a framing issue.
Categories of Fastening Failure and Technical Trade-offs
| Failure Category | Primary Cause | Physical Manifestation | Long-Term Consequence |
| Hard-Nailing | Driving a nail head flush to the hem. | Wavy, buckled panels. | Stress cracks and voided warranties. |
| Off-Center Nailing | Placing nails at the ends of slots. | Panels “unlocking” from corners. | Exposed substrate and wind blow-offs. |
| Angled Fastening | Driving nails at an upward/downward tilt. | Distorted hem shape. | Restricted movement and friction. |
| Over-Spanning | Nails placed more than 16″ apart. | Rattling and sagging. | Structural failure during high winds. |
| Shank Incompatibility | Using smooth-shank nails. | Nails “backing out” over time. | Siding panels are detaching from the wall. |
Choosing between manual hammering and pneumatic fastening involves a significant trade-off. Manual installation offers superior precision and “feel,” but it is labor-intensive and prone to fatigue-related errors toward the end of a long day. Pneumatic tools offer incredible speed and consistency in depth if calibrated, but they lack the feedback loop that tells an installer they’ve hit a knot or a hollow space in the sheathing.
Real-World Scenarios and Second-Order Effects
Scenario A: The Transition Season Install
An installer resides in a climate where morning temperatures are 40°F and afternoons hit 75°F. If they set their gaps and nailing tension based on the morning chill, by 3 PM, the panels have expanded. If they didn’t account for this, the panels may already be pressing against the J-channels, leaving no room for the even hotter summer months. This leads to “pinching,” where the siding is forced to bow outward.
Scenario B: The “High-Wind” Over-Correction
Following a localized storm, a contractor decides to “tighten up” the siding on a new project to prevent blow-offs. They use more nails and drive them tighter. This is a classic example of common vinyl siding nailing mistakes. By restricting movement, they increase the internal tension of the PVC. When the next temperature swing occurs, the siding cannot move, and the pressure on the nail heads becomes so great that the vinyl actually tears away from the fasteners, the exact outcome the contractor was trying to avoid.
Planning, Cost, and Resource Dynamics
The financial implications of nailing errors are rarely felt on day one. They are “delayed-onset” costs. A crew that saves 20% on labor time by rushing through the fastening process may face a 200% loss in profit if they must return to “un-pin” a buckled wall two years later.
| Resource Element | Standard Quality | High-Performance Quality | Cost Delta |
| Fasteners | Electro-galvanized | Stainless steel or hot-dipped | +15-25% |
| Labor Speed | 4-5 squares per day | 2-3 squares per day | +50-70% |
| Supervision | Visual check from the ground | Manual “slide test” on every course | +10% |
The “slide test” is the ultimate insurance policy. After nailing a panel, the installer should be able to slide it back and forth easily with one hand. If it doesn’t move, the nails are too tight. The opportunity cost of ignoring this simple check is the potential for a full-scale siding replacement, as buckled vinyl often retains a “memory” of the distortion even after the nails are loosened.
Tools, Strategies, and Support Systems
-
Hot-Dipped Galvanized Nails: These provide the necessary corrosion resistance and a rougher shank texture to prevent “nail pop.”
-
Pneumatic Siding Adapters: Specialized tips for nail guns that ensure the nail is centered in the slot and driven to a precise depth.
-
The “Dime” Gauge: A simple mental or physical reference to ensure a 1/32-inch gap between the nail head and the siding.
-
Chalk Line Calibration: Ensuring nails are driven into studs, not just the sheathing, to provide the pull-out resistance required by code.
-
Expansion Gapping Tools: Spacers used at the ends of panels to ensure consistent room for thermal movement.
-
Laser Levels: Critical for ensuring the first course is perfectly level; if the starter strip is crooked, every subsequent nail will be slightly “off-center” in its slot to compensate.
The Risk Landscape: Compounding Installation Failures
Nailing mistakes rarely exist in a vacuum. They typically compound with other environmental factors to create “systemic failure.” For instance, a panel that is nailed too tightly (Mistake 1) on a wall with dark-colored siding (which absorbs more heat, increasing expansion) (Factor 2) will fail significantly faster than a light-colored panel with the same nailing error.
Furthermore, “stapling” instead of nailing is a catastrophic risk. While some codes allow for specialized staples, the margin for error is razor-thin. A staple that straddles the hem effectively creates two points of contact that lock the panel in place. In the hierarchy of common vinyl siding nailing mistakes, using the wrong fastener type is the fastest route to a total system collapse.
Governance, Maintenance, and Long-Term Adaptation
A “set it and forget it” mentality is dangerous. While the homeowner shouldn’t have to adjust their siding, a professional contractor should implement a layered checklist during the installation process to govern quality:
-
The Foundation Check: Is the starter strip nailed every 8-12 inches and perfectly level?
-
The Horizontal Slide: Does the panel move at least 1/2 inch in either direction?
-
The Vertical Alignment: Are nails driven straight? (Canted nails pull the hem toward the wall, causing friction).
-
The Stud Lock: Are fasteners hitting structural members, or just the foam/OSB?
Measurement, Tracking, and Evaluation
How do we quantify a “perfect” installation? Success is measured by the absence of noise and distortion.
-
Qualitative Signal (The “Click-Clack”): On a windy day, a properly hung wall of vinyl siding may have a very slight, rhythmic sound. This indicates the panels are loose enough to move.
-
Quantitative Signal (The Expansion Gap): Measuring the gap inside a J-channel at 2 PM versus 8 AM.
-
Documentation: Photos of the “gap” during installation serve as a record of compliance with manufacturer specifications, protecting the contractor from liability if the product itself fails.
Common Misconceptions and Oversimplifications
-
Myth 1: “Tighter is safer against wind.” In reality, tight siding is more likely to crack and blow off because it cannot absorb the energy of the wind by shifting.
-
Myth 2: “You can nail anywhere in the slot.” This ignores the physics of expansion. Always aim for the center.
-
Myth 3: “Power nailers are always better.” They are faster, but they remove the tactile feedback required to sense a “tight” fastener.
-
Myth 4: “Stainless steel is overkill.” In coastal environments, standard galvanized nails will rust, and the resulting oxidation can “bond” the nail to the vinyl, effectively hardening it over time.
Synthesis and Editorial Judgment
The installation of vinyl siding is a paradoxical task: one must secure the material firmly enough to withstand a hurricane while leaving it loose enough to move with the sun. Achieving this balance is the hallmark of a master tradesman. The prevalence of common vinyl siding nailing mistakes suggests that the industry often prioritizes speed over the fundamental physics of the material.