Common Vinyl Siding Flashing Mistakes: A Definitive Guide to Building Envelopes
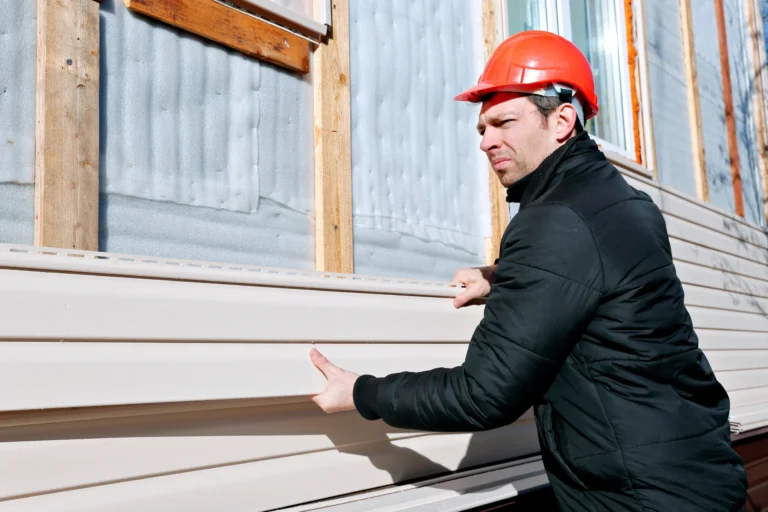
Common vinyl siding flashing mistakes. The durability of a residential structure is rarely decided by the panels that the casual observer sees, but rather by the metal and membrane hidden at the junctions. In the world of exterior cladding, vinyl siding functions primarily as a rainscreen, a decorative and sacrificial layer designed to shed the bulk of precipitation. However, the true defense against structural rot resides in the flashing. Flashing is the strategic implementation of impermeable materials designed to direct water away from the interior wall cavity and toward the exterior. When this system fails, the damage is typically catastrophic, precisely because it remains invisible for years, quietly compromising the wood sheathing and framing.
Mastering the integration of flashing with polyvinyl chloride (PVC) panels requires an understanding of fluid dynamics that goes beyond the basic “shingle effect.” It involves managing the tension between material expansion and water surface tension. Vinyl siding expands and contracts significantly more than the aluminum or galvanized steel often used for flashing, creating a dynamic interface that must remain watertight even as the components move in opposite directions. Failure to account for this kinetic reality is at the heart of most long-term building envelope failures.
This analysis serves as a flagship reference for identifying and rectifying the technical errors that occur at the intersection of siding and structure. By deconstructing the systemic failures often categorized as common vinyl siding flashing mistakes, we can establish a more rigorous standard for moisture management. The following sections explore the historical context, the mechanical frameworks, and the practical scenarios that define professional-grade exterior waterproofing.
Understanding “common vinyl siding flashing mistakes.”

To properly address common vinyl siding flashing mistakes, one must move away from the idea that flashing is merely a “backup” to the siding. From a building science perspective, the flashing is the primary component, and the siding is the aesthetic cover. A multi-perspective view reveals that mistakes occur not just in the material choice, but in the logic of the “lap.” The most pervasive error is the reversal of layers, placing a flashing element behind the weather-resistive barrier (WRB) rather than over it, which essentially funnels water directly into the wall.
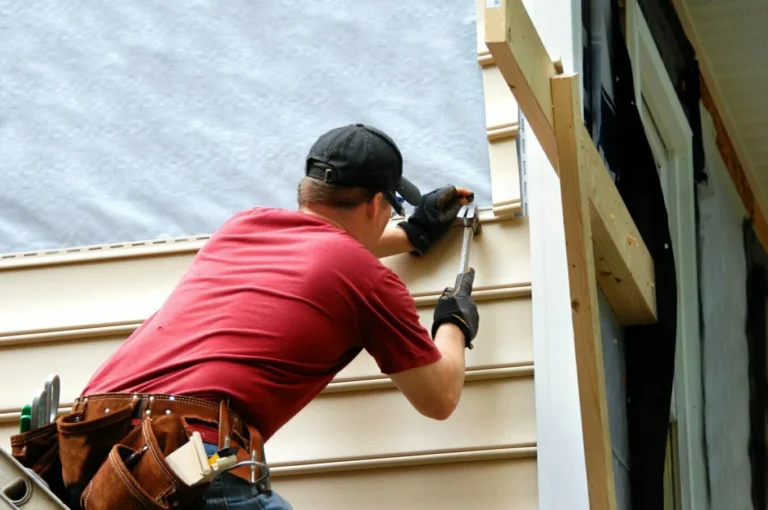
Misunderstandings often arise from the deceptive simplicity of vinyl trim. For example, J-channels are frequently mistaken for flashing. While a J-channel hides the cut end of a siding panel, it is actually a water collection device. Without a dedicated head flashing (or “drip cap”) installed above the J-channel, water running down the wall will sit in the channel, eventually finding its way through the nail hem and into the sheathing. Understanding this distinction is critical for anyone attempting to diagnose why a “newly sided” home is experiencing window-sill rot.
The risk of oversimplification is particularly high in suburban development. Speed often dictates that “one-size-fits-all” flashing is applied regardless of the roof-to-wall intersection or the specific wind-load of the region. A professional-grade installation recognizes that every penetration, be it a dryer vent, a hose bib, or a window, requires a unique flashing profile that accounts for gravity, capillary action, and the specific movement characteristics of the surrounding siding panels.
Historical Evolution of Moisture Diversion Systems
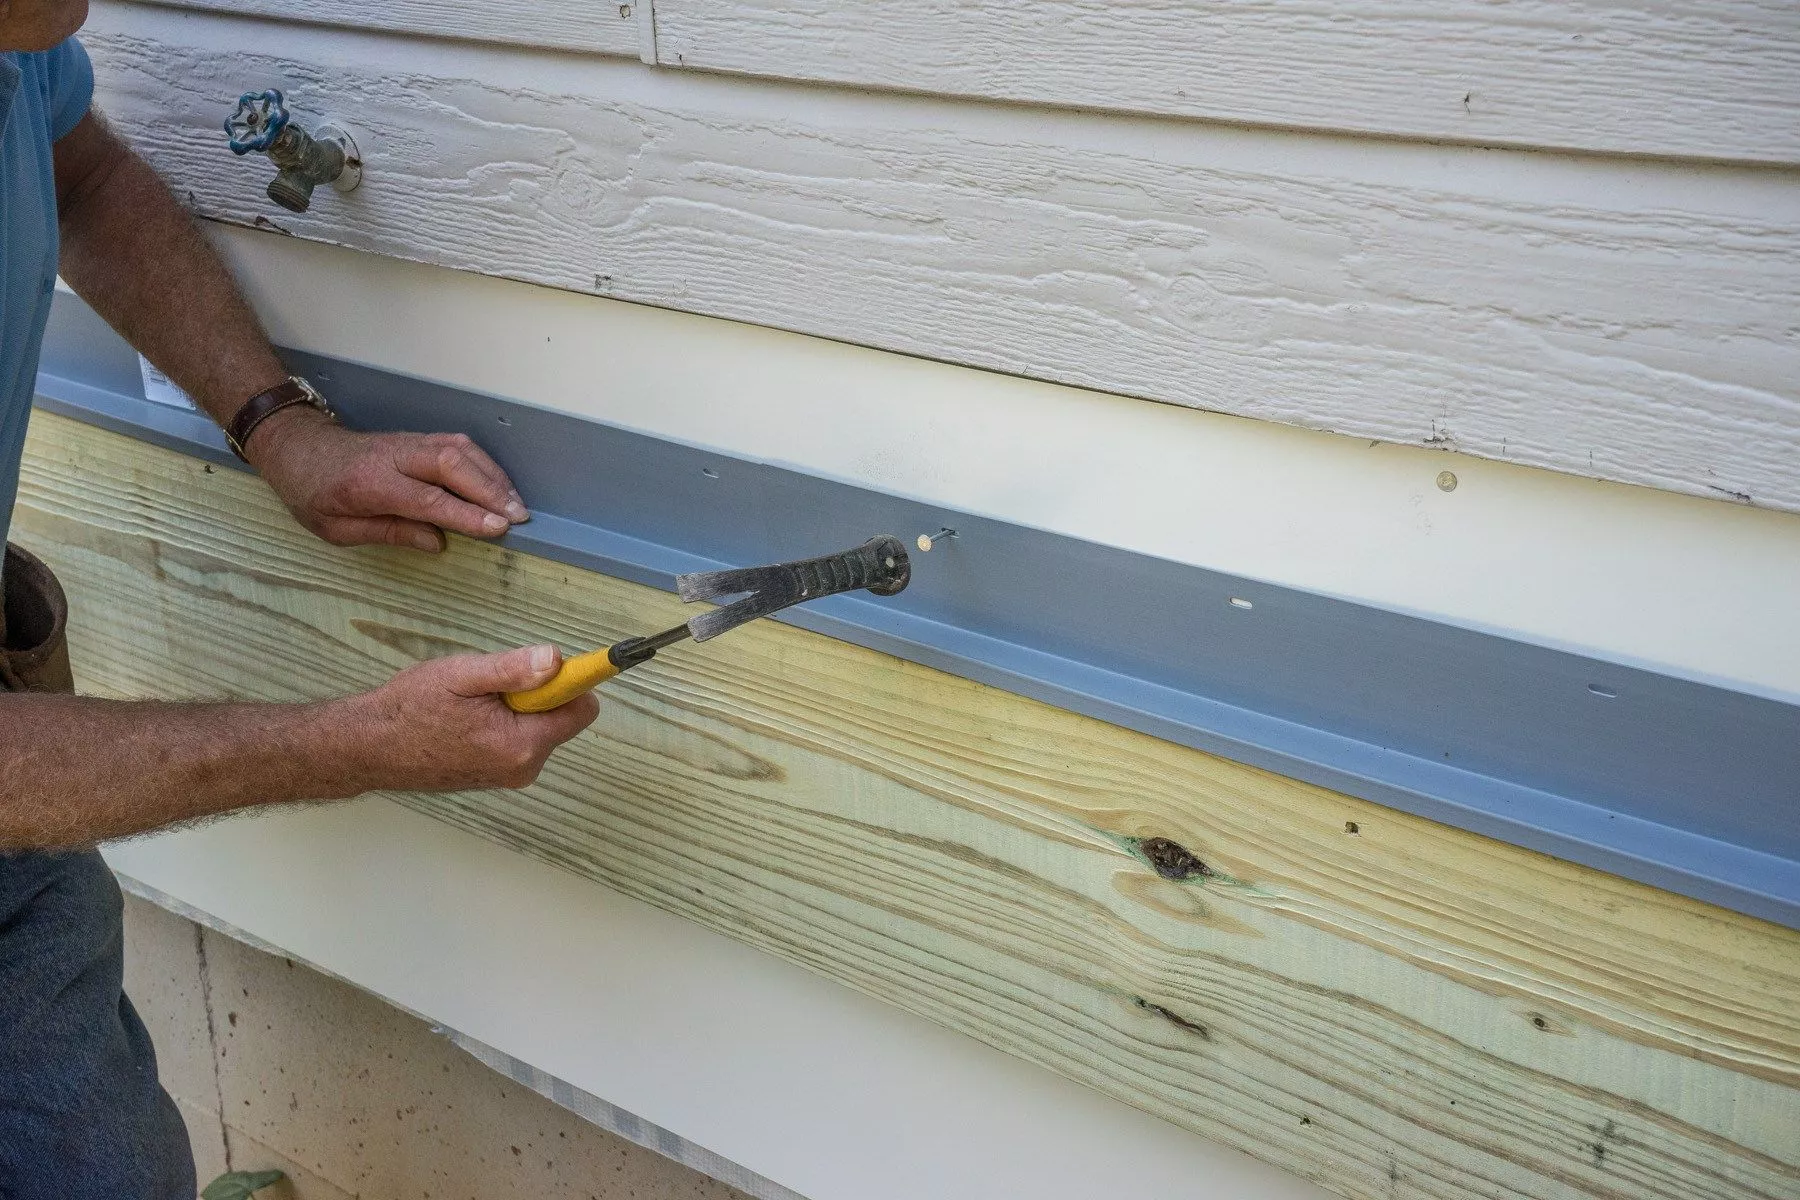
The history of residential flashing reflects a move from natural materials to engineered membranes. In the era of wood siding, lead and copper were the materials of choice, valued for their malleability and longevity. As vinyl became the dominant cladding in the mid-20th century, the industry shifted toward aluminum and galvanized steel. This shift required new techniques; whereas wood could be painted or caulked to hide flashing transitions, vinyl siding’s high coefficient of thermal expansion made “caulk-only” solutions obsolete.
The late 20th century saw the introduction of self-adhering membranes, or “peel-and-stick” flashing. This was a revolutionary development, allowing for a continuous seal that was previously impossible with metal alone. However, this also introduced new failure modes, such as the incompatibility of certain adhesives with the vinyl panels or the WRB. The current state of the art involves “integrated systems” where the flashing, the membrane, and the siding interlock to form a pressure-equalized rainscreen. Understanding this evolution is essential, as many current errors stem from applying “old-world” flashing logic to “new-world” synthetic materials.
Conceptual Frameworks: The Path of Least Resistance
To predict and prevent flashing failure, installers and inspectors should utilize these three mental models:
-
The Gravity Train: Visualize a single drop of water landing at the highest point of the roof. Every transition it encounters as it moves down the wall must offer a path over the next material. If the “train” ever reaches a “track” that leads behind a membrane, the system has failed.
-
The Capillary Break: Water can move upward through tight spaces due to surface tension. A conceptual framework for good flashing involves creating “breaks” or gaps that are wide enough to prevent water from wicking into the substrate.
-
The Dynamic Interface: This model assumes that the siding and the flashing are always moving relative to each other. Flashing that is “pinned” by the siding, or siding that is restricted by the flashing, will eventually buckle or tear, creating a new, unplanned path for water.
Technical Categories of Flashing Failure
Failure in moisture management is rarely random; it typically follows a taxonomy of mechanical errors.
| Failure Category | Mechanism of Damage | Visual Indicator | Long-Term Consequence |
| Reverse Lapping | WRB is tucked behind the flashing flange. | None (Hidden failure). | Rotted sheathing and mold. |
| Missing Kick-out | Roof-to-wall water enters the siding. | Staining at the gutter line. | Structural framing decay. |
| Drip Cap Omission | Water collects in the top J-channel. | Peeling paint on interior sills. | Window frame failure. |
| End-Dam Failure | Water runs off the side of the flashing. | Vertical rot lines below windows. | Interior wall damage. |
| Sealant Reliance | Caulk is used instead of metal flashing. | Cracking or “gapping” at joints. | Systematic water intrusion. |
Decision Logic: Flashing vs. Sealant
A fundamental rule in managing the building envelope is that flashing is permanent, while sealant is temporary. Any design that relies on a bead of caulk to prevent water from entering a major junction is inherently flawed. Proper decision logic dictates that metal or membrane flashing must provide the water-shedding function, with sealant used only for air-sealing or aesthetic closure.
Real-World Scenarios and Second-Order Effects
Scenario A: The Deck-to-Wall Intersection
In this common scenario, the ledger board for a deck is attached directly over the siding or against the sheathing without a “Z-flashing.” Water seeps behind the ledger and is trapped against the house.
-
Primary Failure: Lack of a continuous metal bridge over the ledger.
-
Second-Order Effect: The water-saturated sheathing loses its fastener-holding capacity, eventually causing the deck to pull away from the house, a significant safety hazard.
Scenario B: The Chimney “Step” Failure
Vinyl siding around a chimney requires “step flashing” to be integrated with the siding’s J-channel. If the step flashing is not long enough or is improperly lapped, water will “short-circuit” the system.
-
Primary Failure: Inadequate lap length.
-
Second-Order Effect: Chimney cricket rot, which often leads to ceiling leaks that are mistakenly attributed to a failing roof rather than failing siding flashing.
Planning, Cost, and Resource Dynamics
The economic paradox of flashing is that the materials are inexpensive, but the labor of precision is costly. In a standard residential project, the flashing materials account for less than 5% of the total budget, yet flashing errors account for over 80% of construction defect litigation.
| Resource Type | Standard Level | High-Performance Level | Cost Delta |
| Membrane | Basic asphalt-based | Butyl or Acrylic-based | +20-30% |
| Metal Flashing | Prefabricated aluminum | Custom-bent heavy gauge | +40-50% |
| Labor | General siding crew | Specialized envelope tech | +15-25% |
Investing in a “flashing-first” budget protects the homeowner from the opportunity cost of future remediation. A full-scale mold remediation project following a window flashing failure can cost twenty times the initial investment of a properly installed drip cap and membrane.
Advanced Tools and Strategic Support Systems
-
Portable Brakes: Crucial for creating custom “drip caps” and “Z-flashing” that fit the specific depth of modern insulated vinyl siding.
-
Blower Door Testing: While primarily for air-leakage, it can identify spots where the flashing and WRB are not integrated, as these often double as air-leakage points.
-
Infrared Thermography: Used after a rain event to detect moisture “blooms” behind the siding, indicating where flashing has failed.
-
Integrated Flashing Blocks: These are prefabricated mounting points for lights and outlets that have “built-in” flashing flanges, eliminating the need for manual cutting and taping.
-
Kick-out Flashing Templates: Pre-formed plastic or metal “diverters” that ensure a consistent 110-degree angle for shedding water into gutters.
-
Butyl-Backed Flashing Tapes: Superior to asphalt tapes because they remain flexible in extreme cold and do not “ooze” in extreme heat, maintaining the seal against the vinyl.
The Risk Landscape: Compounding Envelope Failures
The greatest risk in modern construction is the “Tight House” syndrome. In older, drafty houses, a small flashing leak might dry out due to natural airflow. In modern, highly-insulated homes, the same leak becomes a “moisture trap.” The water has nowhere to go, and the lack of drying potential means that rot happens much faster.
This makes common vinyl siding flashing mistakes a compounding risk. A missed drip cap leads to wet sheathing; the wet sheathing reduces the R-value of the insulation; the cold spot on the wall leads to interior condensation; and the resulting mold growth creates an indoor air quality crisis. The failure is not just a “leak,” it is a systemic collapse of the building’s environmental control.
Governance, Maintenance, and Long-Term Adaptation
Flashing is generally a “set-and-forget” system, but it requires governance during the construction phase and periodic review during the life of the building.
-
The Pre-Siding Audit: Before the first panel of vinyl is installed, a “flashing-only” inspection should occur. Once the siding is up, the flashing cannot be verified.
-
Annual Visual Check: Homeowners should look at “kick-out” points and the tops of windows. If the metal looks bent, or if the “Z-flashing” has been crushed by a ladder, the water-shedding path is compromised.
-
Sealant Replacement Cycle: If sealants were used as a secondary defense at flashing junctions, they must be inspected and replaced every 5–7 years.
Measurement, Tracking, and Evaluation
Evaluating the success of a flashing system requires looking for “lagging” indicators of moisture.
-
Quantitative (Moisture Metering): Measuring the moisture content of the rim joist from the basement or crawlspace. A reading above 19% indicates a failure in the flashing system above.
-
Qualitative (The “Bleed” Test): Looking for rust or dark stains emanating from the bottom of a J-channel. This “bleeding” is a sign that water is sitting behind the trim and corroding the fasteners or rotting the wood.
-
Documentation (The Photo Bridge): Maintaining a digital archive of all “rough-in” flashing before the siding covers it. This serves as the “black box” for the building envelope in the event of a future dispute.
Common Misconceptions and Technical Corrections
-
Myth 1: “House wrap is waterproof.” Correction: House wrap is a resistive barrier, not a waterproof one. It is designed to let vapor out while shedding liquid water, but it cannot stop standing water or hydrostatic pressure caused by a flashing error.
-
Myth 2: “Vinyl siding doesn’t need flashing because it’s plastic.” Correction: The plastic is fine; the wood behind it is not. Siding is a screen; flashing is the shield.
-
Myth 3: “J-channel is a substitute for a drip cap.” Correction: J-channel is a trough that holds water. A drip cap is a bridge that sheds water.
-
Myth 4: “More caulk is always better.” Correction: Excessive caulk often blocks the very drainage paths (weep holes) that allow moisture to escape.
-
Myth 5: “Kick-out flashing is ugly and unnecessary.” Correction: It is the single most important piece of metal on the house; omitting it is the leading cause of structural rot in modern homes.
Synthesis and Strategic Judgment
The integrity of a vinyl-sided building is ultimately a matter of patience and intellectual honesty. It is easy to hide a flashing mistake behind a clean piece of trim, but the physics of water will eventually expose the error. A professional approach to the building envelope recognizes that the “invisible” layers are the most important.
Managing common vinyl siding flashing mistakes involves a commitment to the “Gravity Train,” ensuring that every single drop of water has a clear, unencumbered path to the ground. By prioritizing membrane integration, metal drip caps, and mechanical kick-outs over simple sealants and trim, we create structures that are resilient to the increasingly volatile weather patterns of the modern world. Success is not found in the panels themselves, but in the silence of a dry wall.